

Post-Surgery Care at Home: What to Expect from Wound Care, Monitoring, and Recovery Support
Recovering safely after a hospital stay depends as much on what happens at home as in the operating room, and this practical guide to post surgery care at home walks through wound care, symptom monitoring, medication management, mobility and when to escalate care. Designed for family caregivers and recently discharged patients in Ontario, it includes printable checklists, a 7-day recovery timeline, a sample wound log and scripts to use when calling a nurse. No jargon; expect clear step by step actions, red flags to watch for, and realistic examples of how home nursing and PSW support fit into a recovery plan.
Preparing for Discharge and Setting Up Home for Recovery
Start discharge planning early. Begin assembling the essentials the moment surgery is booked so the home is safe and the first 24 to 48 hours after discharge are predictable. The single biggest failure I see is families leaving organization until the day of discharge and then missing a critical home visit or medication dose.
Printable discharge checklist
- Documents to have: hospital discharge summary, list of current medications with doses, surgeon contact and clinic appointment times, written wound care instructions
- Mobility aids: walker, cane, raised toilet seat, non skid footwear, gait belt if a caregiver will assist
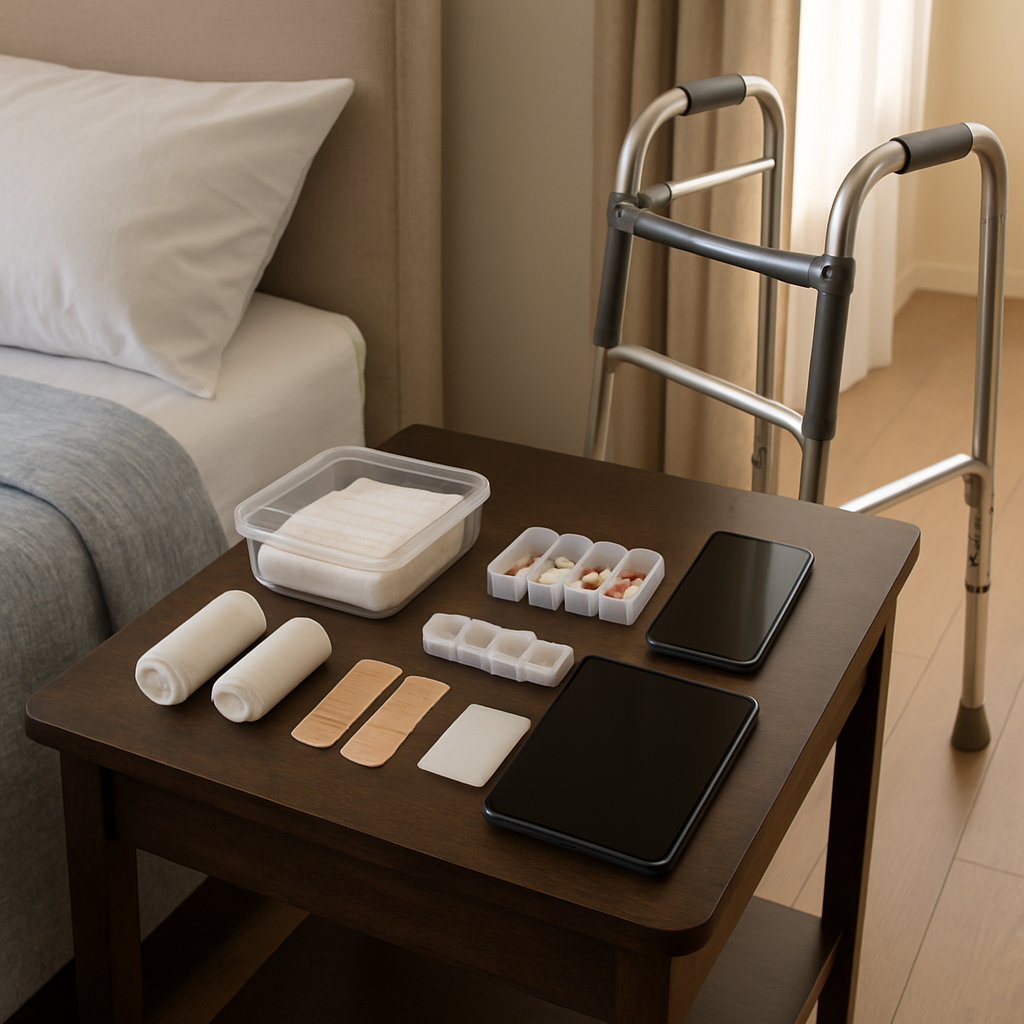
- Wound supplies: sterile gauze, appropriate tape, spare dressings recommended by surgeon, small waste bag for soiled dressings
- Medication setup: pill organizer, clear schedule printed and attached to fridge, phone alarm or medication app set for first 72 hours
- Home setup: bedside table within reach of phone and water, good overhead lighting, remove loose rugs and clutter from main pathways
- Emergency & support numbers: surgeon office, hospital on call, Home and Community Care Support Services, Cedar Home Health Care.
Confirm the first skilled visit before you leave the hospital. Aim for an RN or RPN visit within 24 to 48 hours for wound check and medication reconciliation. If your discharge plan includes publicly funded home care, contact Home and Community Care Support Services immediately and keep the referral number handy Ontario Home Care and Community Support Services.
Stocking supplies is a tradeoff. Buying every dressing type in advance creates wasted expense and confusion; relying entirely on visits risks a delay if the agency schedule shifts. Practical middle ground: buy the specific dressing the surgeon used plus one spare pack, and confirm the agency will supply or top up before you go home.
Concrete example: A 68 year old arriving home after elective hip replacement had a walker ready at the door, the hospital wound dressing packed by family, prescriptions checked against the discharge list, and a scheduled RN visit for the next morning. Because the family removed area rugs and placed a bedside lamp and water within reach, the patient walked safely to the bathroom with the walker and avoided an unnecessary ED call for dizziness.
- Quick safety checklist: clear hallways and stairs, night lights in bathroom and bedroom, non slip footwear, phone within reach and charged
- Communication plan: designate one family point person for calls, keep a written log of who visited and what was done, and prepare a short script for calls to clinicians with patient name, surgery date, current symptoms, and vital signs if available
- Limitations to accept: some complex dressing changes require an RN or RPN and cannot be delegated to PSWs; plan for that gap rather than improvising.
Next consideration: confirm who will perform sterile tasks, who will visit first, and how to escalate if the schedule slips. If there is any doubt about timing or capability, book a private skilled visit for the first 48 hours and reconcile funding options with Cedar Home Health Care When to Hire a Home Nurse.
Wound Care at Home: Types of Dressings, Frequency, and Step by Step Technique
Key point: Choose the dressing to match the wound, not the other way around. The wrong dressing choice or changing dressings too often are the two most common causes of delayed healing and skin breakdown at home.
Common dressing types and when to use them
| Dressing type | When to use | Typical change frequency (practical guideline) |
|---|---|---|
| Sterile gauze + tape | Simple, low-cost covering for low-drain or temporary use | Every 24–48 hours or sooner if wet |
| Transparent film (eg Tegaderm) | Clean, low-drain incisions that need a moisture-controlled environment and shower protection | Leave intact up to 7 days unless drainage appears |
| Foam dressings (eg Mepilex) | Moderate drainage, pressure protection over joint incisions | Every 2–3 days or sooner if saturated |
| Alginate dressings | Moderate to heavy, bloody or purulent drainage; not for dry wounds | Every 24 hours or per nurse direction |
| Hydrocolloid | Low to moderate drainage where a moist environment is wanted, not for infected wounds | Every 3–5 days, watch for maceration |
Practical trade-off: Film dressings are convenient and waterproof but can mask increasing drainage or odour. Use them for stable, low-drain wounds and schedule deliberate inspection days — do not rely on visual checks through the film as a substitute for removal when infection is suspected.
Step-by-step dressing change technique (routine, non-sterile setting)
- Prepare: Gather dressings, gloves, saline or prescribed cleanser, scissors, waste bag, and a clipboard for your wound log. Have analgesia given 30–60 minutes beforehand if the patient needs it.
- Hand hygiene and barrier: Wash hands thoroughly and put on clean gloves. If the wound is expected to be sterile (eg drains, open surgical wound), an RN should perform the change.
- Remove old dressing gently: Peel away slowly, supporting skin with the other hand. Fold the old dressing inward and place in waste bag.
- Inspect and document: Check wound bed colour, drainage amount and colour, edge approximation, surrounding skin condition, and take a photo if permitted. Record findings on your wound log with date/time.
- Clean if ordered: Use normal saline or the wound cleanser specified by the surgeon; irrigate from least to most contaminated area and pat dry with sterile gauze.
- Select appropriate dressing: Apply primary dressing to manage drainage, then secondary absorbent layer and secure with tape or adhesive. Avoid overtight taping that restricts circulation.
- Dispose and finish: Remove gloves, wash hands, date the new dressing on the tape, and note the change in your log.
Concrete example: A patient discharged after elective knee replacement with a dry, well-approximated incision can keep the original transparent film for 5–7 days. The caregiver inspects the edge daily through clothing, removes the film on day 5 for a brief check, documents a dry incision, and reapplies a film for shower protection. If serous drainage appears, they switch to a foam dressing and call the home nurse.
Real-world limitation: Many families think more frequent dressing changes reduce infection risk. In practice unnecessary changes increase contamination risk and cause skin maceration. Follow surgeon or RN instructions; if unsure, a single well-documented daily check is safer than repeated, unsanitary handling.
Do not attempt a sterile dressing change for complex wounds, drains, or when instructed that sterile technique is required — book an RN visit via your home care provider instead. See What a Home Health Care Provider Does for role details.
Further reading: For clinical best practices and nuance on wound assessment, consult the Registered Nurses Association of Ontario guidelines: RNAO Best Practice Guidelines.
Monitoring Vital Signs and Symptoms: What to Track and How Often
Straight rule for caregivers: in post surgery care at home priority monitoring is simple and focused — temperature, heart rate, breathing, oxygen when indicated, blood pressure when ordered, and a plain pain score. These measurements catch the common, actionable changes that precede complications and let a visiting RN use objective data rather than impressions alone. Consult the hospital discharge plan and local home care resources such as Home and Community Care Support Services to confirm which vitals were ordered for your situation.
What to track and suggested frequency
| Parameter | Suggested frequency first 7 days | Action threshold |
|---|---|---|
| Temperature | Twice daily and with new symptoms | >= 38 C or rising trend over 24 hours |
| Heart rate (pulse) | Twice daily and after activity | > 100 bpm at rest or sudden drop below 50 bpm |
| Respiratory rate | Once daily or with breathlessness | > 20 breaths per minute at rest or increased work of breathing |
| Blood pressure | Once daily if ordered, otherwise as clinician advises | Systolic < 90 mmHg or persistently > 160 mmHg with symptoms |
| Oxygen saturation | If baseline lung disease or thoracic surgery: twice daily and with symptoms | < 92% unless clinician specifies a different baseline |
| Pain score (0-10) | Before and 1 hour after analgesics and after activity | Persistent > 7 despite analgesia or increasing trend |
| Wound notes | Daily visual check and record after dressing changes | Increasing drainage, new foul smell, swelling, or wound opening |
Practical trade off: more frequent checks catch problems earlier but raise false alarms and sleep disruption. For most elective procedures spot checks twice daily plus symptom-triggered checks are sufficient; reserve continuous monitoring for patients with pulmonary risk, major cardiac disease, or unstable anticoagulation. Pulse oximeters are useful but lose accuracy with poor perfusion, nail polish, or cold hands — trust the whole clinical picture not a single reading.
- Quick protocol to follow: measure at consistent times – morning before meds, before physiotherapy or activity, and evening before bed.
- Use the right technique: let the patient rest five minutes before measuring heart rate or blood pressure; place thermometers and pulse oximeters on the same site you will use again to reduce variability.
- Record and share: keep a simple log and photograph the wound at each dressing change if the surgeon or RN agrees; store photos with dates and note activity level when readings were taken.
- Escalation plan: agree with your RN what combination of findings triggers an urgent phone call versus an emergency department visit.
Concrete example: a 72 year old patient discharged after hip replacement is instructed to record temperature twice daily, a pain score before and after physiotherapy sessions, and a wound note each evening. On day 3 the caregiver records a temperature of 38.2 C plus increased swelling around the incision; the caregiver calls the scheduled RN visit and the RN assesses the wound and arranges an urgent clinic review rather than waiting for the next scheduled visit. That sequence prevented a delayed escalation and avoided unnecessary transport when the issue was manageable at clinic level.
Key judgment: monitoring works when it is predictable and shared. Create a simple schedule, assign responsibility to one person at a time, and review the trend with the visiting RN instead of treating every single abnormality as an emergency.
Next consideration: agree the exact monitoring schedule and thresholds with the discharging team or your first home visit RN, and document who will call for which findings. If you need guidance on what the RN will assess at the first visit see Understanding the Importance of Nursing Education in Home Care.
Medication Management During Recovery: Analgesics, Antibiotics, and Anticoagulants
Start here: medication mistakes are the common, preventable cause of readmission after discharge. Effective post surgery care at home depends less on heroic dosing and more on accurate reconciliation, scheduled administration, and early recognition of adverse effects.
Quick checklist for medication reconciliation
- Confirm the list: compare the hospital discharge list to the home medication list and remove drugs the team stopped.
- Write the why and for how long: beside each drug note indication and stop date (for example, antibiotic: cefalexin — 7 days).
- Identify interactions: flag combinations that increase bleeding, sedation, or serotonin risk and confirm with a pharmacist.
- Assign roles: who administers, who refills, and who calls the prescriber if doses are missed or side effects appear.
Practical insight: timed, simple routines beat complex instructions. Use a two-week pill organiser for fixed-dose meds and daily alarms for PRN opioids. If a patient is sedated or at fall risk, defer PRN opioids until supervised mobility is possible — that trade-off reduces falls even if pain control is slightly slower.
| Medication class | Key caregiver actions |
|---|---|
| Analgesics (acetaminophen, NSAIDs, short-term opioids) | Follow scheduled non-opioid first; reserve opioids for breakthrough pain; monitor for drowsiness, constipation and falls |
| Antibiotics | Complete full course, note start and expected finish dates, watch for rash or severe diarrhoea and report promptly |
Anticoagulants (warfarin, DOACs) |
Track dosing and lab monitoring (INR for warfarin), watch for new bruising or bleeding, keep a medication list for all providers |
Limitation and trade-off: aggressive pain suppression with opioids reduces reported pain but increases delirium, fall risk, and constipation. In practice, combine scheduled acetaminophen with short, time-limited opioid prescriptions and a constipation plan. For NSAIDs, check with the surgeon — in some cases they are appropriate, in others they increase bleeding or impair bone healing.
Concrete example: Mrs. R, 72, discharged after knee replacement had a 5-day opioid prescription plus scheduled acetaminophen. Cedar RN set up a pill organiser, taught bowel prevention (stool softener plus fibre), and arranged INR checks after the surgeon started a DOAC. Within 48 hours the RN adjusted the opioid to PRN only because Mrs. R tolerated acetaminophen and walking better with physiotherapy.
What caregivers often misunderstand: stopping antibiotics when symptoms improve is common but dangerous. Completing the prescribed course prevents resistant infections. Similarly, people assume a lower INR is safer; under-anticoagulation can cause clots — follow lab targets, not feelings.
Where Cedar fits: Cedar nurses can perform medication reconciliation at the first visit, administer or supervise complex doses, and liaise with prescribers or pharmacists. See how Cedar explains nursing roles and education in home care What a Home Health Care Provider Does and Nurse Education in Ontario. For Ontario system context, review Home and Community Care Support Services guidance Ontario Home Care.
Next consideration: set a review point at 48 to 72 hours after discharge for medication side-effect checks and a plan to taper opioids or stop antibiotics as appropriate — early, proactive adjustment prevents most medication-related complications during home recovery after surgery.
Mobility, Activities of Daily Living and Preventing Complications
Key point: Early, planned movement prevents common post-operative complications but must be balanced against surgical restrictions and pain. Pushing too hard increases risk of wound disruption or falls; doing too little increases risk of blood clots, pneumonia and prolonged dependence.
Progressive mobility—what to aim for and what to avoid
Practical guidance: Start with short, supervised sessions: sit up at the bedside, stand with support, then take short walks 3–5 times a day. Use the surgeon or physiotherapist mobility orders as your ceiling and pain control as your limiter. If pain prevents the first few steps, call the RN for an analgesia review rather than forcing movement.
- Hip replacement: weight-bearing as permitted; use a walker for first 2 weeks, practice sit-to-stand 3 times per session, 3 sessions daily.
- Abdominal surgery: avoid Valsalva and heavy lifting; start with supported sit-ups and 5–10 minute corridor walks, increasing by 5 minutes daily as tolerated.
- Shoulder surgery: no active overhead movement if ordered; perform supervised pendulum and scapular exercises only, avoiding strain on the repair.
Concrete example: After an elective hip replacement, a common early plan is: RN visit day 1 to confirm vitals and wound, PSW-assisted walks with a gait belt twice on day 1, physiotherapy referral for day 2, and a morning/evening checklist to encourage independence with safe transfers. This sequence reduces fall risk while progressing mobility quickly enough to lower DVT and pulmonary complication risk.
Safe transfers, equipment and caregiver technique
Technique to use: For most transfers use a gait belt, have the patient wear non-slip footwear, face the patient when standing, and coach them to push from the chair arms. If you need to help more than briefly, get a second caregiver. Avoid pulling under the arms; that risks shoulder and skin injury.
- Gait belt steps: snug belt low on waist, patient leans forward, caregiver stabilizes knees, cue patient to stand on count of three.
- When two people are required: unsteady patient, >50% weight-bearing deficit, or cognitive impairment that impairs following instructions.
- Home prep for safe movement: clear pathways, remove rugs, ensure good lighting and a stable chair of appropriate height.
ADL support from PSWs: PSWs handle bathing, toileting, dressing, meal prep and light housework to reduce infection risk and conserve the patient energy for rehabilitation. They do not perform complex sterile dressing changes; coordinate with your RN for those tasks (see What to Expect from Home Aide Services).
Preventing common complications: practical steps and trade-offs
DVT and circulation: Encourage ankle pumps every hour while awake, early ambulation, and follow orders on compression stockings. If the patient is on anticoagulants, weigh the benefit of earlier mobilization against fall risk — a fall while anticoagulated has real consequences. Discuss this balance with the RN or prescriber.
Pulmonary protection: Teach deep breathing and coughing or use an incentive spirometer to reduce atelectasis risk. These exercises are low cost and effective; they rarely harm and often prevent readmission for chest complications. See NHS guidance on post-op breathing exercises: Recovering after surgery.
Caregiver trade-off to acknowledge: Families often default to doing everything for the patient to be safe. That reduces mobility practice and delays recovery. The short-term discomfort of supervised, repeated practice yields better independence and lowers long-term caregiver load.
Takeaway: Plan movement deliberately — short, frequent, supervised sessions; use equipment and PSW support to balance safety with progression toward independence.

When to Call a Nurse or Seek Emergency Care: Specific Red Flags and Scripts to Use
Immediate action matters. Call 911 for life threatening signs and contact your home care nurse for urgent but non life threatening changes that still need clinical assessment within hours.
Practical decision rules: 911, urgent ED, or home nurse?
Call 911 now if you see any of the following: heavy arterial bleeding (bright red, spurting or cannot be controlled with firm pressure), sudden severe shortness of breath or new inability to speak, chest pain that feels crushing or radiates to the arm or jaw, sudden collapse or seizure, or any new symptoms suggesting stroke such as sudden facial droop or one sided weakness. These are immediate, non negotiable emergencies.
Go to the emergency department if the patient is stable but has rapidly expanding redness around a wound, fever persisting above 38 C despite antipyretics, signs of significant dehydration, vomiting that prevents taking oral meds, or uncontrolled bleeding that is slowing but still significant. ED can do imaging, IV antibiotics, suturing, or blood tests immediately.
Call your home care nurse or agency when symptoms are concerning but the patient is hemodynamically stable: dressing saturated without major bleeding, increasing localized wound pain over days, new purulent or odorous drainage with no systemic features, small persistent low grade fever, confusion that is new but mild, or medication problems such as missed anticoagulant doses. An RN can often assess in-home within hours and arrange escalation if needed. For Ontario readers, Cedar can help coordinate an RN visit; see When to Hire a Home Nurse.
What to have ready before you call
- Patient basics: full name, date of birth, surgery type and date
- Current condition: vital signs (temperature, heart rate, breathing), a brief wound description and photo if possible
- Medications: especially anticoagulants, antibiotics and opioids with last taken time
- What you already tried: pressure applied, elevation, analgesics, or dressing changes
Phone scripts you can use
- Phone script for calling your home nurse or agency: Hello, this is [your name]. I am calling about [patient name], DOB [xx/xx/xxxx], discharged after [surgery type] on [date]. Their temperature is [x.x C], pain is [x/10], and their wound is [describe: soaked/odour/redness]. They are on [list anticoagulant if applicable]. Can you arrange an RN assessment today? Our phone is [number] and we are at [address].
- Phone script for calling 911: Hi, my name is [your name]. I need an ambulance for [patient name]. They are [brief state: e.g., unresponsive/bleeding heavily/having trouble breathing]. Their surgical history: [type and date]. We are at [address].
Trade off to accept: calling 911 covers worst case quickly but ties up emergency resources and can be traumatic for patients who might have been managed at home. Calling a nurse first often works for graded problems, but it delays treatment if the issue is actually life threatening. When in doubt about breathing, circulation, or consciousness, choose 911.
Concrete example: A client three days after abdominal surgery noticed the dressing soaked through and the patient felt lightheaded. The caregiver applied pressure and checked vitals: BP 95/60, HR 115, temperature 37.8 C. Because blood pressure was low and heart rate high, they called 911. EMS found moderate bleeding requiring ED evaluation. If vitals had been stable and only the dressing soaked, an RN visit could have been a faster, less disruptive option.
How Cedar Home Health Care Supports Post Surgery Recovery in Ontario
Cedar provides a predictable, clinical-first support plan that plugs into Ontario discharge pathways. We focus on front-loading skilled nursing where it matters—early wound assessment, medication reconciliation, and anticoagulant oversight—and pairing that with PSW-led daily support to preserve independence and reduce readmissions.
- Skilled nursing (RN/RPN): wound assessment, sterile dressing changes when ordered, medication review, IV/antibiotic follow-up, and care plans shared with surgeons or clinics. See When to Hire a Home Nurse: Signs, Responsibilities, and How to Prepare – Cedar Home Health Care.
- Personal Support Workers (PSWs): ADL assistance, safe transfers, reinforcement of mobility orders, meal prep, toileting, and reinforcement of hygiene to protect surgical sites.
- Care coordination and navigation: scheduling visits, communicating with Home and Community Care Support Services, arranging referrals, and providing documentation for Passport funding requests.
- Family coaching and education: brief, practical training for caregivers on medication timing, safe transfers, and what to report to a nurse.
Practical trade-off to understand: daily RN visits are ideal in the first 48 to 72 hours post discharge but are more costly and sometimes constrained by staffing.** In practice the most effective pattern is RN front-loading (initial assessment and stabilization) then handing routine checks and ADLs to PSWs under RN oversight. That balances clinical safety and affordability.
Concrete example: Mr. Singh is discharged after a hip replacement. Cedar schedules an RN visit within 24 hours to verify the wound, reconcile medications (including his anticoagulant), and confirm mobility orders with physiotherapy notes. An RPN or RN returns on day 3 and day 7; PSWs come twice daily for the first week to help with showers, toileting, and safe walking until he can manage with one visit per day.
| Typical early post-discharge schedule | What Cedar does |
|---|---|
| Hip replacement — first 7 days | RN visit day 1 and day 3; PSW twice daily days 1–7; RN day 7 for wound check and med review |
| Abdominal surgery — first 7 days | RN visit within 24 hours for wound and bowel function check; PSW daily for ADLs and meal prep; RN or RPN alternate days if antibiotics/IV needed |
Limitations and what Cedar cannot replace: we do not supersede surgeon orders or provide emergency services; complex in-hospital procedures requiring daily physician-level assessment still require clinic follow-up.** Home service scheduling can be limited in rural areas and some advanced nursing tasks need prior physician authorization or Home and Community Care Support Services coordination.
Coordination advantage: Cedar actively prepares the paperwork and communicates with Home and Community Care Support Services so families avoid the common delay in getting funded visits.** For clients needing Passport support, Cedar helps gather documentation and referral steps to speed eligibility discussions.
Judgment from practice: an early RN assessment paired with reliable PSW support prevents most avoidable readmissions after common surgeries.** If you can only arrange one type of visit quickly, get the RN assessment first—then layer PSW visits for daily living support.
Sample 7 Day Recovery Timeline and Printable Wound Log Template
Start strong in the first 72 hours. The earliest days after discharge set the tone for wound healing, pain control, and preventing avoidable readmissions — plan concrete checks rather than vague intentions.
| Day | What to expect / activity | Dressing checks & visits | Pain & meds | Practical note |
|---|---|---|---|---|
| Day 0 (discharge) | Rest at home; arrange first RN/PSW visit within 24–48 hours | Leave initial hospital dressing intact unless told otherwise | Start prescribed analgesia on the scheduled plan; note baseline pain score | Have discharge summary and medication list ready for the first visit |
| Day 1 | Light mobility indoors (as ordered); sit-to-stand practice | RN visit or phone check; start wound log entries after first inspection | Expect highest opioid needs — use scheduled acetaminophen around the clock if advised | Take consistent wound photo with ruler for remote review if asked |
| Day 2 | Increase short walks; continue breathing exercises | RN or RPN wound assessment; possible dressing change depending on drainage | Begin opioid taper planning; prophylaxis for constipation if prescribed | Confirm follow-up surgeon appointment and any lab/INR monitoring |
| Day 3 | Gradual rise in activity tolerance; light ADLs with PSW help | PSW can assist with hygiene and dressing support under RN direction | Reassess pain control; switch to PRN dosing where appropriate | Record bowel movements and urine output — common early complications |
| Day 4 | More walking; practice transfers safely | RN visit if wound showing concerns; otherwise routine dressing check | Reduce opioid frequency where pain is controlled; encourage non-opioid adjuncts | If mobility stalls, consider a physiotherapy referral |
| Day 5–6 | Return to most light tasks; avoid heavy lifting | Alternate-day wound checks unless drainage persists | Most patients can be on low-dose analgesics or acetaminophen only | Start planning for suture/staple removal timing with surgeon |
| Day 7 | Expect meaningful improvement in pain and mobility for many elective procedures | Weekly wound assessment plan established; continue the wound log | Finalize analgesic taper and safe disposal of unused opioids | If milestone goals not met, arrange earlier RN reassessment or clinic visit |
Printable wound log template (copy, paste, print)
Keep it lean. Too many fields means no one fills it. Use this minimal template at every dressing check or twice daily.
- Date / Time: 2026-05-24 09:00
- Dressing changed?: Yes / No
- Drainage amount: None / Small / Moderate / Heavy
- Drainage colour / odour: Clear / Bloody / Purulent / Foul
- Pain (0–10) at wound site: 4
- Temp (C): 36.8
- Wound edge / skin: Flat / Redness <2 cm / Breakdown / Opening
- Photo taken: Yes (filename or phone) — use same lighting and ruler
- Notes / action: RN informed / Watch / ER
Concrete Example: A 68-year-old after elective knee replacement recorded twice-daily entries for 7 days. On Day 2 the wound log showed increasing bloody drainage and a rising pain score; an RN review by phone led to an in-home visit and earlier dressing reinforcement, preventing an unnecessary ED trip.
Trade-off to consider: Detailed logs help clinicians triage remotely but increase caregiver workload. If your caregiver load is high, commit to essential fields only (date/time, drainage amount, pain score, photo) and rely on scheduled RN checks to fill clinical detail.
Judgment call: The first week is where quick, simple documentation and at least one skilled nursing review do more to prevent complications than nonstop monitoring. If funding or scheduling delays mean no early RN visit, prioritize a clear wound log plus dated photos and contact Home and Community Care Support Services as your next step.